Containers
In This Lesson:
Adding A Container
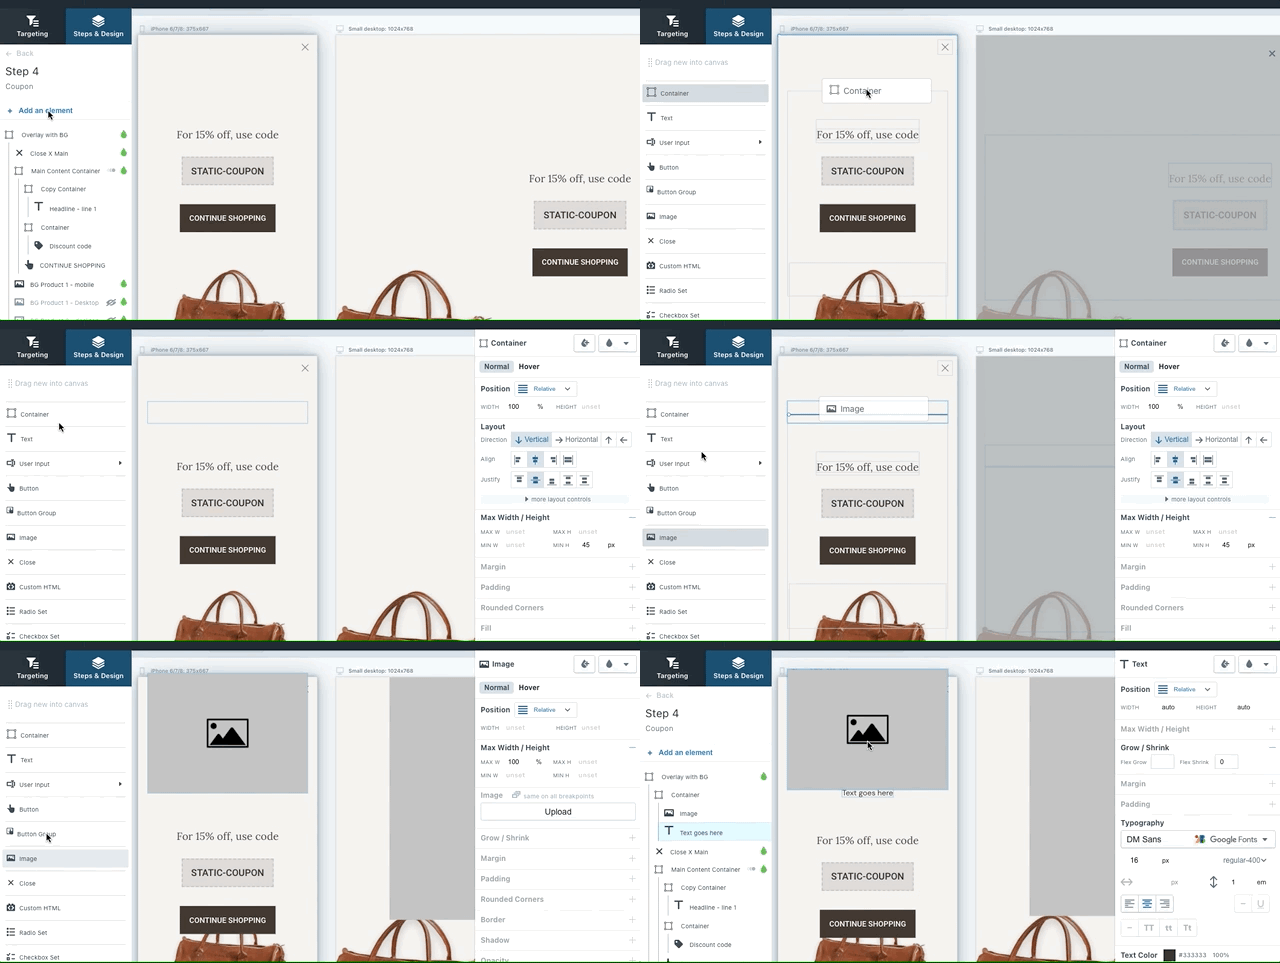
To add a container element, click "Add An Element" under the Steps & Design tab.
Drag the container element into your campaign and drop it at your desired position.

How To Use Containers
Think of containers as boxes you use to add content to. You can choose which elements you want to add to your campaign within Containers you add.
Containers have a position which can be Relative, Absolute, or Fixed (read more here)
Relative position means the position of this container will be layout in relation to the other elements, one after the other.
Absolute position means that you can give a very specific set of coordinates to the container and it will go to that position regardless of other elements. Absolute position is based on the containers position inside of any other container.
Fixed position is very similar to Absolute position in that you give it specific coordinates for it’s position but Fixed will position based on the visitors browser window and disregard the position of any other elements that the container is inside of. This can be helpful when you have for example things in the background that are accents and if the content of the campaign scrolls, you do not want the other parts to scroll. See more on scrolling under “Overflow & scrolling”

Sizing of Containers
Containers have specific widths and heights
Available sizing options
- Pixels - set vertical or horizontal pixel size and the other dimension will adjust automatically
- Percentage - set vertical or horizontal percentage size and the other dimension will adjust automatically
- Auto - will let the container size to the content inside of it
- Unset - no size can be set which means the width will change based on the content
Containers can also have minimum widths and heights as well as maximum widths and heights.
These are helpful when you use auto/unset/ or percentage based width or heights but you want to limit the minimum or maximum sizing of the element.


